安裝Server 2008 Server Core 並不困難, 只要放installation disc 跟指示一步一步執行便會到登入畫面, 預設第一次登入密碼是:P@ssw0rd
由於server core 沒有GUI, 安裝Hyper-V全程只靠command 執行
1. 在command prompt 輸入oclist
2. 輸入bcdedit /set hypervisorlaunchtype auto, 設定hypervisor 自動執行
3. 再輸入start /w ocsetup Microsoft-Hyper-V
4. 再輸入oclist, 會看見Hyper-V 已經安裝成功
要移除Hyper-V Service
start /w ocsetup Microsoft-Hyper-V /uninstall
2010年2月18日星期四
2010年2月4日星期四
Windows 7 RC 版將於 2010 年 6 月 1 日到期
自 2010 年 2 月 15 日起,還在使用Windows 7 RC的電腦會開始收到系統通知,告知您RC版即將到期的訊息,並請您盡速備份您的電腦資料。而 2010 年 3 月 1 日起,電腦會每兩小時會自動關機,直到 2010 年 6 月 1 日 RC 版到期為止。因此,為了降低您的不便,請盡速重新安裝 Windows 7 正式版或其他有效的 Windows 版本,若您仍需要更多時間評估 Windows 7,可下載Windows 7 企業版90天試用版。
From Microsoft Taiwan Blog
From Microsoft Taiwan Blog
Technet HK 新遊戲 - TechNet 尋「抓」密碼遊戲 ('Catch the code' Challenge)

上 TechNet 網站尋「抓」問題及密碼,跟住將密碼及答案發送訊息至 http://www.facebook.com/MSHKTechCom 。即有機會獲贈 Microsoft Arc Mouse 乙隻! 記住要登記咗做會員,先可以參加!
2010年2月3日星期三
一個指令實現Windows 備份和還原
在Windows XP 或更前的年代, 很多IT PRO 都會利用Ghost 來做Backup and Restore 方案, 亦有很多公司, 學校會利用Network Ghost 版本來部署大量Client Computers,但這些都是收費軟件,不穩定和慢,來到了Windows Vista/7 年代, 提供了一套自己的系統備份工具,只需幾個指令便可實現.
1. 建立WinPE USB 手指開機
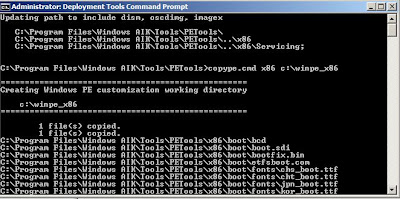
A. 安裝Windows Automated Installation, 之後用管理員身份打開"Deployment Tools Command Prompt", 輸入"copype.cmd x86 c:\winpe_x86" 如是x64, 請把"x86" 轉成"amd64"
B. 把winpe.wim mount 到c:\winpe_x86\mount 資料夾內, 在command Prompt 輸入"Dism /Mount-Wim /WimFile:C:\winpe_x86\winpe.wim /index:1 /MountDir:c:\winpe_x86\mount"

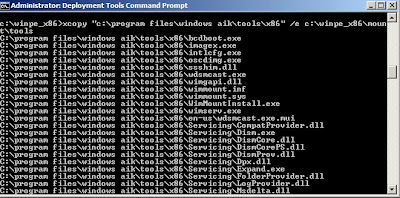
C.複制需要的工具到winpe_x86\tools 下, 輸入"mkdir c:\winpe_x86\mount\tools" 建立Tools 資料夾, 然後輸入"xcopy "c:\programs files\windows aik\x86" /e c:\winpe_x86\mount\tools"
D. 把已準備好的winpe.wim 封存, 輸入"Dism /unmount-wim /mountdir:c:\winpe_x86\mount /commit"

E. 複制winpe.wim 到c:\winpe_x86\ISO\sources 並改名boot.wim 用來開機,輸入"copy c:\winpe_x86\winpe.wim c:\winpe_x86\ISO\sources\boot.wim

F. 準備一隻手指, 格式化並建立一個active primary partition, 用管理員身份打開打開"Command Prompt", 輸入以下指令
Diskpart
List Disk
Select Disk 3 <--3 是指手指. clean create partition primary active format quick fs=ntfs assign letter=u exit G. 把Windows PE 檔案複制至手指 "xcopy c:\winpe_x86\iso\*.* /e u:\"
2. 用winpe 手指開機, 並用imagex /capture指令建立Image (備份)
A. 連接USB Harddisk 或用net use 指令連接network drive, 如已連線的network drive Letter "F:", 輸入"imagex /capture c: f:\backup.wim "Backup" /compress none"
imagex /capture image_path image_file "name" {"description"} {/boot /check /compress [type] /config /flags "EditionID" /norpfix /scroll /verify}
B. 如想看wim 檔案資料
" imagex /info f:/backup.wim"
imagex /info img_file[img_number img_name] [new_name] [new_desc] {/boot /check}
3. 利用imagex /apply 指令還原
A. 建立primary partition
diskpart
select disk 0
clean
create partition primary
assign letter=c:
active
exit
format c: /q /y
B. 還原影象檔
imagex /apply f:\backup.wim 1 c:\
C. 設定開機
bcdboot C:\windows /s
1. 建立WinPE USB 手指開機
A. 安裝Windows Automated Installation, 之後用管理員身份打開"Deployment Tools Command Prompt", 輸入"copype.cmd x86 c:\winpe_x86" 如是x64, 請把"x86" 轉成"amd64"

B. 把winpe.wim mount 到c:\winpe_x86\mount 資料夾內, 在command Prompt 輸入"Dism /Mount-Wim /WimFile:C:\winpe_x86\winpe.wim /index:1 /MountDir:c:\winpe_x86\mount"

C.複制需要的工具到winpe_x86\tools 下, 輸入"mkdir c:\winpe_x86\mount\tools" 建立Tools 資料夾, 然後輸入"xcopy "c:\programs files\windows aik\x86" /e c:\winpe_x86\mount\tools"

D. 把已準備好的winpe.wim 封存, 輸入"Dism /unmount-wim /mountdir:c:\winpe_x86\mount /commit"

E. 複制winpe.wim 到c:\winpe_x86\ISO\sources 並改名boot.wim 用來開機,輸入"copy c:\winpe_x86\winpe.wim c:\winpe_x86\ISO\sources\boot.wim

F. 準備一隻手指, 格式化並建立一個active primary partition, 用管理員身份打開打開"Command Prompt", 輸入以下指令
Diskpart
List Disk
Select Disk 3 <--3 是指手指. clean create partition primary active format quick fs=ntfs assign letter=u exit G. 把Windows PE 檔案複制至手指 "xcopy c:\winpe_x86\iso\*.* /e u:\"
2. 用winpe 手指開機, 並用imagex /capture指令建立Image (備份)

A. 連接USB Harddisk 或用net use 指令連接network drive, 如已連線的network drive Letter "F:", 輸入"imagex /capture c: f:\backup.wim "Backup" /compress none"
imagex /capture image_path image_file "name" {"description"} {/boot /check /compress [type] /config /flags "EditionID" /norpfix /scroll /verify}
B. 如想看wim 檔案資料
" imagex /info f:/backup.wim"
imagex /info img_file[img_number img_name] [new_name] [new_desc] {/boot /check}
3. 利用imagex /apply 指令還原
A. 建立primary partition
diskpart
select disk 0
clean
create partition primary
assign letter=c:
active
exit
format c: /q /y
B. 還原影象檔
imagex /apply f:\backup.wim 1 c:\
C. 設定開機
bcdboot C:\windows /s
Windows Server 2008 R2 – 如何利用Windows Deployment Service 大量部署Windows XP SP3 到Client Computers 並自動加入網域 (Join Domain)
上次提及如何利用WDS + VHD 部署Windows 7 到Client Computers, 今次講述如何抓取(Capture) Windows XP SP3 做Reference Image (.wim 檔案)
*VHD 只支持Windows 7 和Windows Server 2008 R2*
部署環境
WDS + DHCP + AD: Windows Server 2008 R2
Reference Image: Windows XP SP3 + Application + Sysprep Tool
A.新增Capture Boot Image 來抓取 Reference Image
準備一部Reference 電腦, 安裝完Windows 和 所有Applications並執行sysprep tool 來準備capture image. (Sysprep Tool 在Windows XP SP3 安裝碟內\tools\deploy.cab)
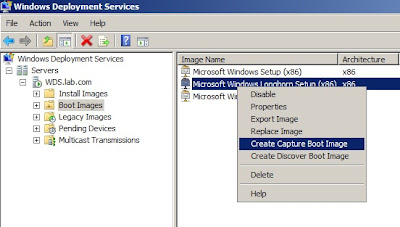
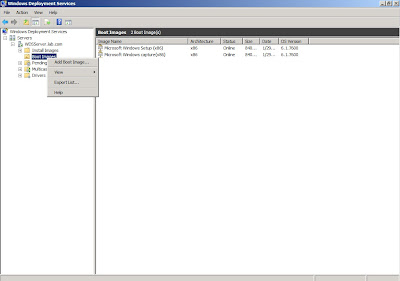
B. 打開WDS 控制台, 在已加入了Boot Image 按滑鼠右鍵, 選擇”Create Capture Boot Image”, 按指示選好儲存位置和更改名稱, 如: Microsoft Windows Capture Setup (x86) 及在Install Images 建立Image Group “WinXP”
C.開啟Reference Computer 並選擇Boot from Network, 會出現開機選單, 選擇Windows Capture Setup (x86) 開機, 等一會便出現以下畫面
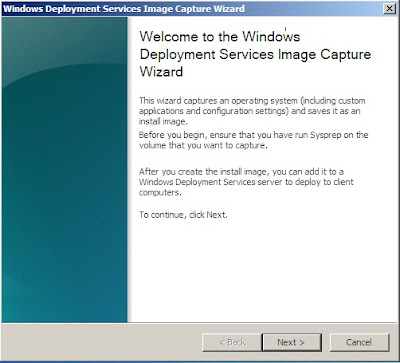
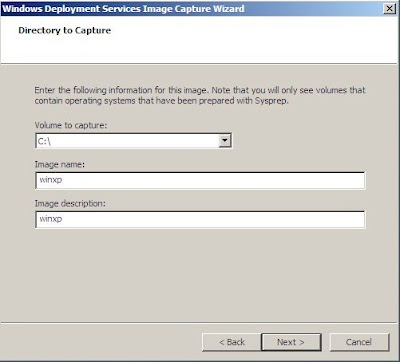
D. 向下箭咀選取”C:\” (一定要執行了sysprep, 才可以選取) 為Image 檔改名和Description
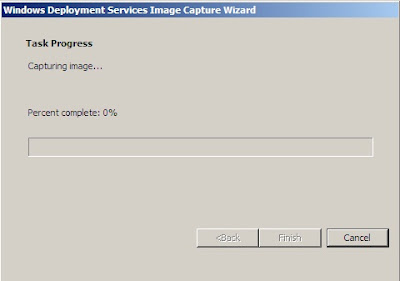
E. 上載到WDS Server 上
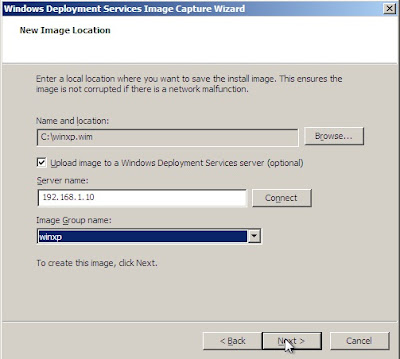
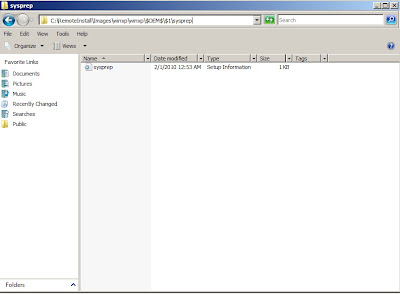
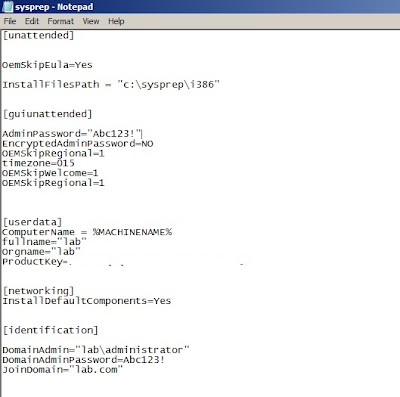
F. 在C:\RemoteInstall\Images\winxp\winxp建立$OEM$\$1\sysprep 資料夾, 建立sysprep.inf 並儲存這個資料夾下(因為Windows XP 不支援unattended.xml 做answer file)
*VHD 只支持Windows 7 和Windows Server 2008 R2*
部署環境
WDS + DHCP + AD: Windows Server 2008 R2
Reference Image: Windows XP SP3 + Application + Sysprep Tool
A.新增Capture Boot Image 來抓取 Reference Image
準備一部Reference 電腦, 安裝完Windows 和 所有Applications並執行sysprep tool 來準備capture image. (Sysprep Tool 在Windows XP SP3 安裝碟內\tools\deploy.cab)
B. 打開WDS 控制台, 在已加入了Boot Image 按滑鼠右鍵, 選擇”Create Capture Boot Image”, 按指示選好儲存位置和更改名稱, 如: Microsoft Windows Capture Setup (x86) 及在Install Images 建立Image Group “WinXP”

C.開啟Reference Computer 並選擇Boot from Network, 會出現開機選單, 選擇Windows Capture Setup (x86) 開機, 等一會便出現以下畫面

D. 向下箭咀選取”C:\” (一定要執行了sysprep, 才可以選取) 為Image 檔改名和Description

E. 上載到WDS Server 上


F. 在C:\RemoteInstall\Images\winxp\winxp建立$OEM$\$1\sysprep 資料夾, 建立sysprep.inf 並儲存這個資料夾下(因為Windows XP 不支援unattended.xml 做answer file)


2010年2月2日星期二
Windows Server 2008 R2 - 利用Windows Development Service 把VHD 大量Deploy 到Client PC
之前提及過VHD 是Windows 7 & Windows Server 2008 R2 重要新增支持, 今次教如何經Windows Deployment Service把reference VHD 部署到Client PC.
好處:
1. 用統一的Image 套用到實體和虛擬電腦上, 方便管理
2. 只要用一set 工具便可實現
3. 快速部署新電腦
今次所需環境
WDS + AD + DHCP Server: Windows Server 2008R2
Windows Automated Installation Kit
Sysprep Tool
1. 預備Reference VHD
首先, 用Microsoft Virtual PC/Hyper-V 安裝OS, Application, 及設定所需設定, 之後用Sysprep封存, Sysprep主要功能在於「封存」到沒有SID的狀態, 主要是用來防止用戶在多台電腦安裝同一個Windows令出現網絡識別問題, 另外如果已經有實體電腦, 可以利用Disk2VHD Tool 轉成VHD 做可. 但都一定要執行Sysprep.
Sysprep 位置: C:\Windows\System32\sysprep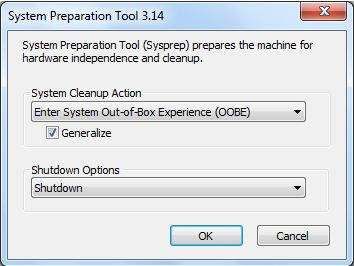
選取 OOBE, Generalize, Shutdown, 當執行完成便會自動關機, 之後便用這個reference vhd 來部署Client PC.
2. 安裝和設定Windows Deployment Service
Windows Deployment Service 要在AD 環境內實現, 在”Add Role” 選取”Windows Deployment Service” 和”DHCP” 服務, 然後”Next”
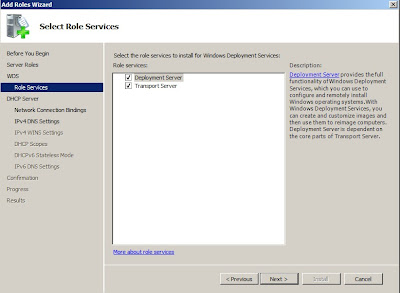
A. 在”Role Service” 選取”Deployment Server” 和”Transport Server”, 按”Next”
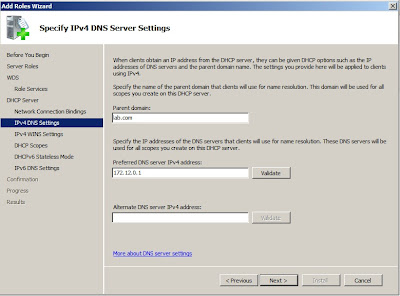
B.在設定DHCP 版面”Specify IPv4 DNS Setting” 輸入”Parent Domain”, “DNS Server IPv4 Address” 按”Next”
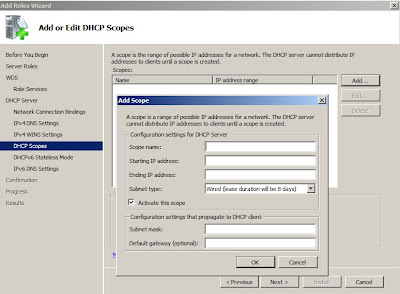
C. 在”Add or Edit DHCP Scopes” 新增DHCP IP 範圍, 按”Next”
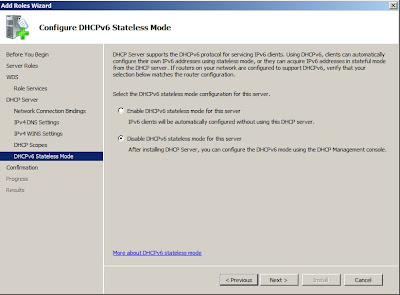
D. 在”Configure DHCPv6 Stateless Mode” 選取”Disable DHCPv6 stateless mode for this server”
之後按”Next” 再按”Install” 等待安裝完成.
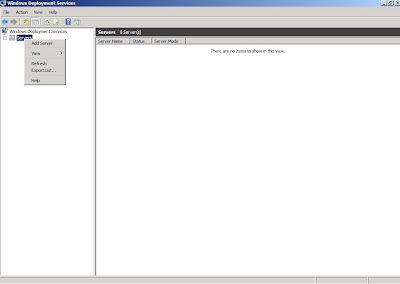
E. 打開”Windows Deployment Services”,按”Add Server” 新增server
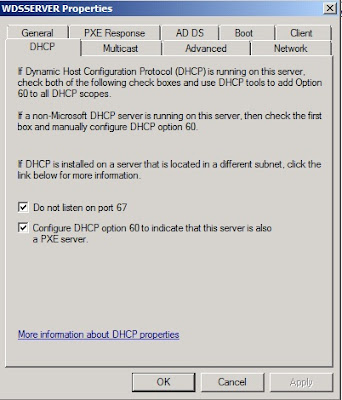
F. 在DHCP Tab, 因為DHCP 和WDS Service 都是同一部機上, 所以要選取兩個options
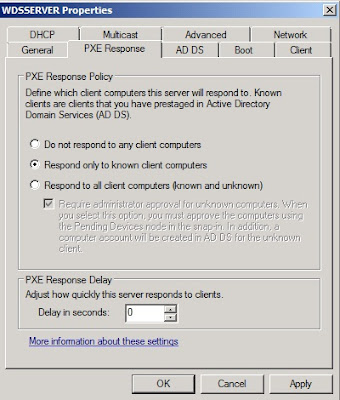
G.在PXE Response Tab, 因為稍後在AD DS上會預先設定client computers, 所以WDS Server只會response to KNOW client computers
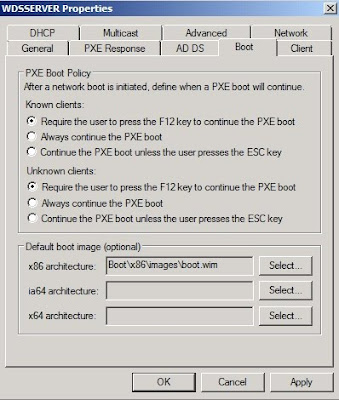
H. 在Boot Tab, 可以設定client computer boot from PXE 時需不需要按F12 才可以繼續, 而Default boot image, 可以預設會用哪個boot image 來開機, 稍後會用command 分別為不同client computers 來套用不同boot image.
3. 新增boot & install images
A. 新增Boot Image, 可在Windows 7 或Windows Server 2008 R2 安裝碟內找到\source\boot.wim
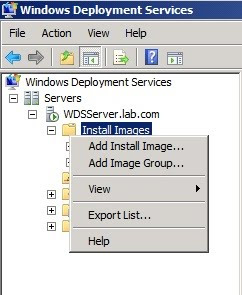
B.在Install Images Folder 新增Image Group “win7”
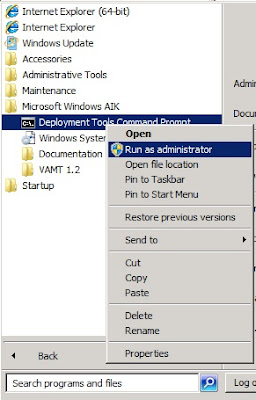
C. 安裝WAIK, 並用Administrator 執行Deployment Tools Command Prompt.
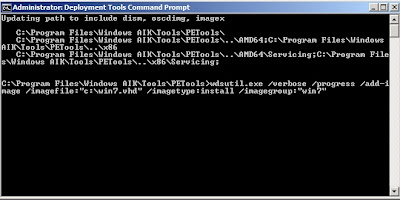
D. 把已封存的VHD 新增到WDS 內, 因為在WDS MMC 不能直接新增VHD 檔案, 所以要用command 來實現
Wdsutil.exe /verbose /progress /add-image /imagefile:”c:\win7.vhd” /imagetype:install /imagegroup:”win7”
E.新增成功便可在WDS 控制台發現已加入的image

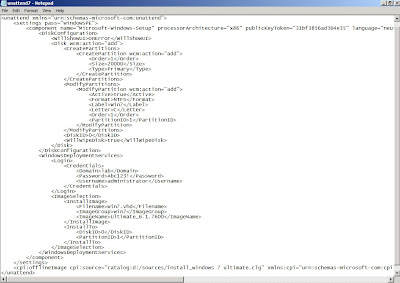
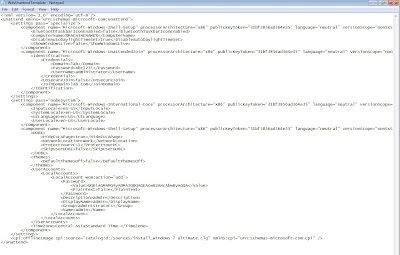
F. 開啟Windows System Image Manager,建立兩個files, unattended file 是~來回應Windows Deployment Service, answer file是回應安裝windows 7.
建立一個unattended file 叫”unattend7” 並儲存在”C:\RemoteInstall\WdsClientUnattend”
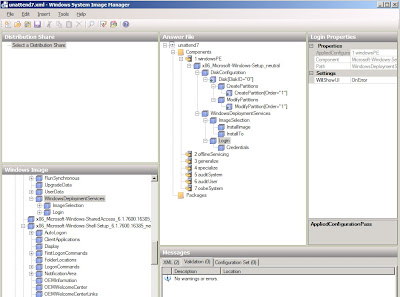
G. 建立一個answer file 叫”WdsUnattendTemplate”, 並儲存在任何地方
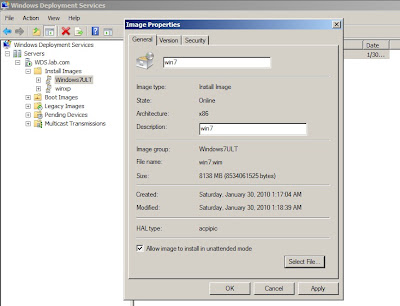
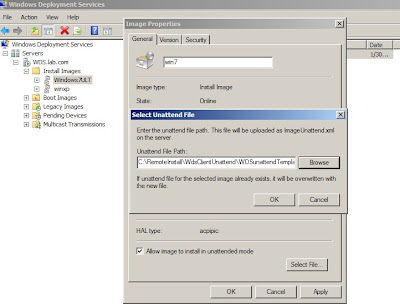
H. 回到WDS控制台, 展開”Install Images”滑鼠右鍵指向Image, 按”Properties” , 選取”Allow Image to install in unattended mode” , 選取剛剛建立的answer file
4. 預先設定client computers, 並設定Client Computer使用指定的Boot Image, Install Image.
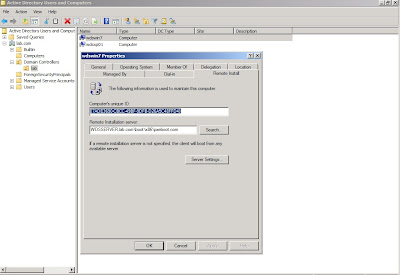
A. 在DC 上開啟Active Directory Users and Computers, 新增”Computer” 在computer’s unique ID: 輸入client computer GUID: {xxxxxxxx-xxxx-xxxx-xxxx-xxxxxxxxxxxx} 或MAC address: 0000000000000000mac address (在mac address 前要加入20個0), 設定WDS Server Name
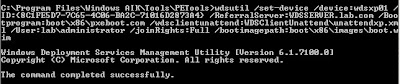
在Deployment Tools Command Prompt, 設定computer 其他資料, 如要套用哪個unattend.xml, pxeboot.com, boot image, Join Domain 權限
Wdsutil .exe /set-device /device:wdsxp01 /ID:{xxxxxxx} /ReferralServer:wdsserver.lab.com /Bootprogram:boot/x86/pxeboot.com /wdsclientunattend:WDSClientUnattend\unattend7.xml /User:lab\administrator /JoinRights:Full /bootimagepath:boot\x86\images\boot.wim
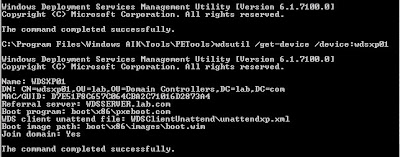
查詢Client 設定資料
Wdsutil.exe /get-device /device:name
5. 開始Deploy Client Computer
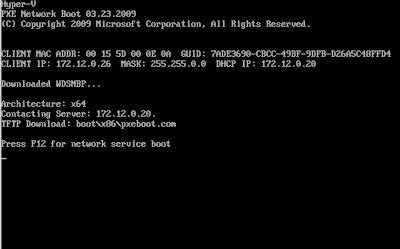
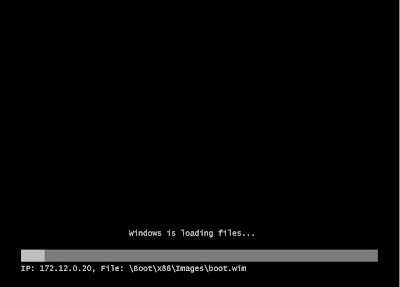
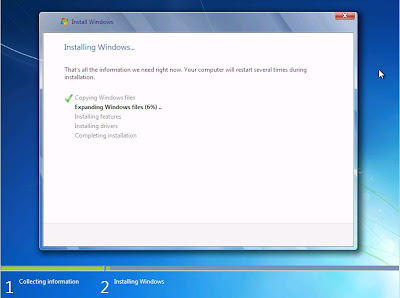
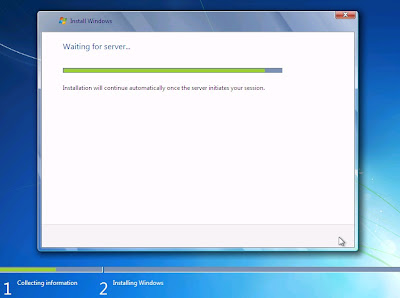
啟動Client Computer 並按”F12”選擇從Boot From Network, 之後做會完全自動化直到整個Windows 7安裝完成.
好處:
1. 用統一的Image 套用到實體和虛擬電腦上, 方便管理
2. 只要用一set 工具便可實現
3. 快速部署新電腦
今次所需環境
WDS + AD + DHCP Server: Windows Server 2008R2
Windows Automated Installation Kit
Sysprep Tool
1. 預備Reference VHD
首先, 用Microsoft Virtual PC/Hyper-V 安裝OS, Application, 及設定所需設定, 之後用Sysprep封存, Sysprep主要功能在於「封存」到沒有SID的狀態, 主要是用來防止用戶在多台電腦安裝同一個Windows令出現網絡識別問題, 另外如果已經有實體電腦, 可以利用Disk2VHD Tool 轉成VHD 做可. 但都一定要執行Sysprep.
Sysprep 位置: C:\Windows\System32\sysprep

選取 OOBE, Generalize, Shutdown, 當執行完成便會自動關機, 之後便用這個reference vhd 來部署Client PC.
2. 安裝和設定Windows Deployment Service
Windows Deployment Service 要在AD 環境內實現, 在”Add Role” 選取”Windows Deployment Service” 和”DHCP” 服務, 然後”Next”
A. 在”Role Service” 選取”Deployment Server” 和”Transport Server”, 按”Next”

B.在設定DHCP 版面”Specify IPv4 DNS Setting” 輸入”Parent Domain”, “DNS Server IPv4 Address” 按”Next”

C. 在”Add or Edit DHCP Scopes” 新增DHCP IP 範圍, 按”Next”

D. 在”Configure DHCPv6 Stateless Mode” 選取”Disable DHCPv6 stateless mode for this server”
之後按”Next” 再按”Install” 等待安裝完成.

E. 打開”Windows Deployment Services”,按”Add Server” 新增server

F. 在DHCP Tab, 因為DHCP 和WDS Service 都是同一部機上, 所以要選取兩個options

G.在PXE Response Tab, 因為稍後在AD DS上會預先設定client computers, 所以WDS Server只會response to KNOW client computers

H. 在Boot Tab, 可以設定client computer boot from PXE 時需不需要按F12 才可以繼續, 而Default boot image, 可以預設會用哪個boot image 來開機, 稍後會用command 分別為不同client computers 來套用不同boot image.

3. 新增boot & install images
A. 新增Boot Image, 可在Windows 7 或Windows Server 2008 R2 安裝碟內找到\source\boot.wim

B.在Install Images Folder 新增Image Group “win7”

C. 安裝WAIK, 並用Administrator 執行Deployment Tools Command Prompt.

D. 把已封存的VHD 新增到WDS 內, 因為在WDS MMC 不能直接新增VHD 檔案, 所以要用command 來實現
Wdsutil.exe /verbose /progress /add-image /imagefile:”c:\win7.vhd” /imagetype:install /imagegroup:”win7”

E.新增成功便可在WDS 控制台發現已加入的image

F. 開啟Windows System Image Manager,建立兩個files, unattended file 是~來回應Windows Deployment Service, answer file是回應安裝windows 7.
建立一個unattended file 叫”unattend7” 並儲存在”C:\RemoteInstall\WdsClientUnattend”


G. 建立一個answer file 叫”WdsUnattendTemplate”, 並儲存在任何地方

H. 回到WDS控制台, 展開”Install Images”滑鼠右鍵指向Image, 按”Properties” , 選取”Allow Image to install in unattended mode” , 選取剛剛建立的answer file


4. 預先設定client computers, 並設定Client Computer使用指定的Boot Image, Install Image.
A. 在DC 上開啟Active Directory Users and Computers, 新增”Computer” 在computer’s unique ID: 輸入client computer GUID: {xxxxxxxx-xxxx-xxxx-xxxx-xxxxxxxxxxxx} 或MAC address: 0000000000000000mac address (在mac address 前要加入20個0), 設定WDS Server Name

在Deployment Tools Command Prompt, 設定computer 其他資料, 如要套用哪個unattend.xml, pxeboot.com, boot image, Join Domain 權限
Wdsutil .exe /set-device /device:wdsxp01 /ID:{xxxxxxx} /ReferralServer:wdsserver.lab.com /Bootprogram:boot/x86/pxeboot.com /wdsclientunattend:WDSClientUnattend\unattend7.xml /User:lab\administrator /JoinRights:Full /bootimagepath:boot\x86\images\boot.wim

查詢Client 設定資料
Wdsutil.exe /get-device /device:name

5. 開始Deploy Client Computer
啟動Client Computer 並按”F12”選擇從Boot From Network, 之後做會完全自動化直到整個Windows 7安裝完成.


訂閱:
文章 (Atom)
